本篇博客介绍了 Pinpoint 的部署和使用。
1、安装 JAVA,并配置 JAVA_HOME
2、下载 pinpoint 安装包(https://github.com/naver/pinpoint/releases)
- pinpoint-agent-1.8.0.tar.gz
- pinpoint-web-1.8.0.war
- pinpoint-collector-1.8.0.war
- pinpoint-master.zip
3、下载 hbase(http://apache.mirror.cdnetworks.com/hbase/stable/)
4、下载 tomcat
- apache-tomcat-9.0.12.tar.gz
5、机器配置:
8C-16G-500G
1)启动 hbase 并检查启动状态
 1
 2
 3
 4
 5
 6
 7
 8
 9
10
11
12
13
14
|
[root@xdhuxc bin]# pwd
/root/pinpoint/hbase-1.4.7/bin
[root@xdhuxc bin]# ls
draining_servers.rb   hbase-cleanup.sh  hbase-config.sh   hirb.rb                 region_mover.rb   rolling-restart.sh        stop-hbase.cmd  zookeepers.sh
get-active-master.rb  hbase.cmd         hbase-daemon.sh   local-master-backup.sh  regionservers.sh  shutdown_regionserver.rb  stop-hbase.sh
graceful_stop.sh      hbase-common.sh   hbase-daemons.sh  local-regionservers.sh  region_status.rb  start-hbase.cmd           test
hbase                 hbase-config.cmd  hbase-jruby       master-backup.sh        replication       start-hbase.sh            thread-pool.rb
[root@xdhuxc bin]# ./start-hbase.sh
running master, logging to /root/pinpoint/hbase-1.4.7/bin/../logs/hbase-root-master-xdhuxc.out
Java HotSpot(TM) 64-Bit Server VM warning: ignoring option PermSize=128m; support was removed in 8.0
Java HotSpot(TM) 64-Bit Server VM warning: ignoring option MaxPermSize=128m; support was removed in 8.0
[root@xdhuxc bin]# jps  # 使用 jps 命令查看 hbase 是否启动成功,如果看到 ‘HMaster’ 的进程,则表明 hbase 启动成功。
7926 HMaster
7974 Jps
|
2)初始化 pinpoint 所需的表(https://github.com/naver/pinpoint/blob/master/hbase/scripts/hbase-create.hbase)
1
2
3
4
5
6
7
8
|
[root@xdhuxc bin]# pwd
/root/pinpoint/hbase-1.4.7/bin
[root@xdhuxc bin]# ls
draining_servers.rb   hbase-cleanup.sh  hbase-config.sh     hbase-jruby             master-backup.sh  replication               start-hbase.sh  thread-pool.rb
get-active-master.rb  hbase.cmd         hbase-create.hbase  hirb.rb                 region_mover.rb   rolling-restart.sh        stop-hbase.cmd  zookeepers.sh
graceful_stop.sh      hbase-common.sh   hbase-daemon.sh     local-master-backup.sh  regionservers.sh  shutdown_regionserver.rb  stop-hbase.sh
hbase                 hbase-config.cmd  hbase-daemons.sh    local-regionservers.sh  region_status.rb  start-hbase.cmd           test
[root@xdhuxc bin]# ./hbase shell hbase-create.hbase
|
使用命令查看导入的表
1
2
|
./hbase shell
status 'detailed'
|
1)将 pinpoint-collector-1.8.0.war 复制到 apache-tomcat-9.0.12/webapps/ 目录下,修改 pinpoint-collector-1.8.0/WEB-INF/classes 目录下的文件 hbase.properties,
修改如下内容:
1
2
|
hbase.client.host=localhost
hbase.client.port=2181
|
指向 zookeeper 的地址和端口。如果是本机,localhost建议改为本地外网IP地址,端口默认,则这里无需更改。
1)将 pinpoint-web-1.8.0.war 复制到 apache-tomcat-9.0.12/webapps/ 目录下,修改 pinpoint-web-1.8.0/WEB-INF/classes 目录下的文件 hbase.properties,
修改如下内容:
1
2
|
hbase.client.host=localhost
hbase.client.port=2181
|
指向 zookeeper 的地址和端口。如果是本机,localhost建议改为本机外网IP地址,端口默认,则这里无需更改。
1)创建目录 pinpoint-agent 并解压 pinpoint-agent-1.8.0.tar.gz 到该目录下
1
|
mkdir pinpoint-agent && tar -zxf pinpoint-agent-1.8.0.tar.gz -C pinpoint-agent
|
2)配置 pinpoint.config
1
|
profiler.collector.ip=127.0.0.1
|
这是指 pinpoint-collector 的地址,如果是同一服务器,可保持默认,建议修改为本机外网IP地址。
3)安装 pinpoint-collector 启动后,自动就开启了9994,9995,9996的端口了,这里默认即可。
如果有端口需求,要去 pinpoint-collector 的配置文件 pinpoint-collector-1.8.0/WEB-INF/classes/pinpoint-collector.properties 中,修改这些端口。
1)修改 tomcat 的 catalina.sh 文件,加入如下内容
1
2
3
|
CATALINA_OPTS="$CATALINA_OPTS -javaagent:/root/pinpoint/pinpoint-agent/pinpoint-bootstrap-1.8.0.jar"
CATALINA_OPTS="$CATALINA_OPTS -Dpinpoint.agentId=xdhuxc"
CATALINA_OPTS="$CATALINA_OPTS -Dpinpoint.applicationName=XdhuxcAPP"
|
第一行,指定 pinpoint-bootstrap-1.8.0.jar 的位置。
第二行,指定 agentId,必须唯一,用于标志一个 JVM。
第三行,指定 applicationName,表示同一种应用,同一个应用的不同实例应用使用不同的 agentId,相同的 applicationName。
此时,apache-tomcat-9.0.12/webapps 目录结构如下:
1
2
3
4
|
[root@xdhuxc webapps]# pwd
/root/pinpoint/apache-tomcat-9.0.12/webapps
[root@xdhuxc webapps]# ls
docs  examples  host-manager  jenkins  jenkins.war  manager  pinpoint-collector  pinpoint-web  ROOT
|
如果是以 jar 包方式部署 spring boot 项目,直接在启动命令中添加启动参数:
1
|
nohup java -javaagent:/root/pinpoint/pinpoint-agent/pinpoint-bootstrap-1.8.0.jar -Dpinpoint.agentId=xdhuxc -Dpinpoint.applicationName=XdhuxcAPP -jar xdhuxc.jar &
|
在 apache-tomcat-9.0.12/webapps 目录下放置要监控的应用程序 war 包,然后启动 tomcat。
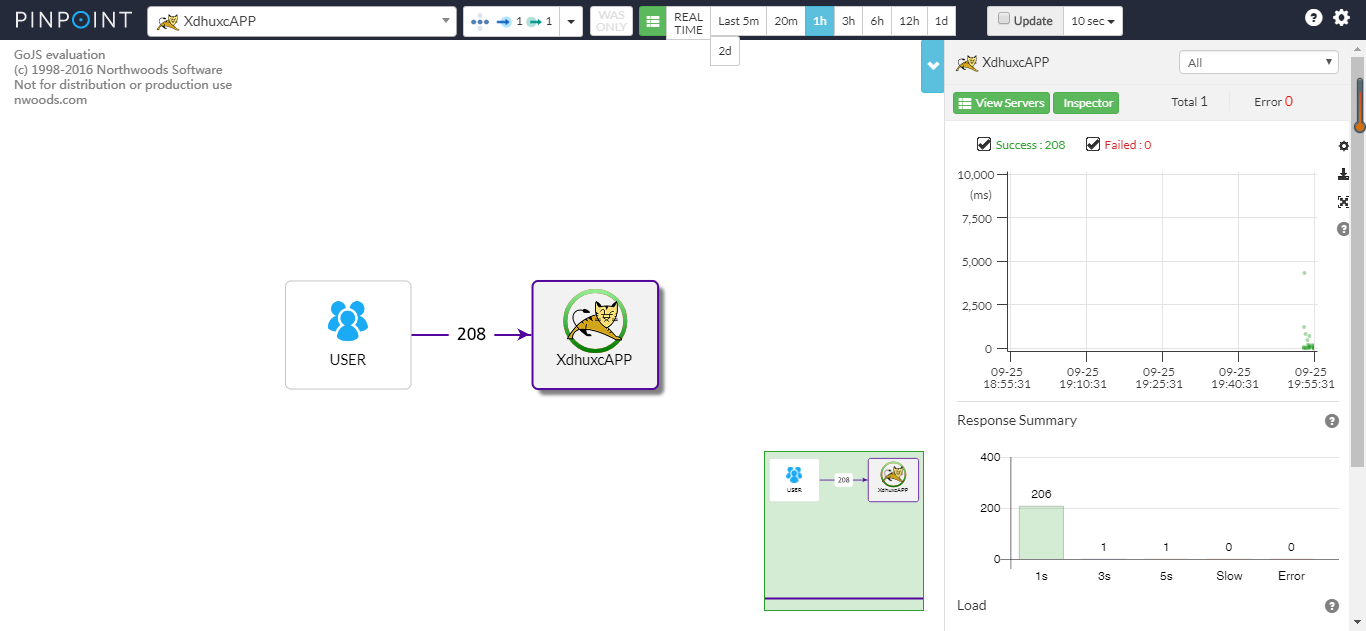
访问如下路径:
http://172.20.26.149:8080/pinpoint-web
如下图所示:
https://blog.csdn.net/heyeqingquan/article/details/74456591
http://naver.github.io/pinpoint/1.8.0/main.html